Pages

Showing posts with label Flourish Thinlet Dies. Show all posts

Saturday, 20 January 2018

Stampin' Up! Sparkle, Shimmer and Shine Thank You card

Jillian Selwood, Purple Jelly Designs, Independent Stampin’ Up! Demonstrator

Simply Sketched Saturday has had a face lift, we are now called The InspirINK Blog Hop, bringing you inspiration every month.

This month our theme is Sparkle, shimmer and shine.


One thing I don't really do is sparkle, shimmer and shine so this month's theme was a bit of a struggle for me, in more ways than one as the original card I made whilst it fit the bill exactly, I just didn't like it. So finally at the very last minute I came up with this card. This is based on a card I made for one of the Simply Sketched Saturday challenges last year and I really love the layout so it is one of my go to layout designs.

Burmuda Bay, Myths and Magic Glimmer paper, Flourish Thinlit Dies

I started off with a Thick Whisper White base. The layer is from the Bubbles & Fizz Sale-A-Bration DSP, available until end of March with a qualifying order. I then used the Stitched Shaped Framelits to die cut a Burmuda Bay circle, a Silver Foil circle and a Shimmery White Circle which is stamped with Thank you from the new Southern Serenade stamp set. The glimmer paper is from the Myths and Magic Glimmer paper pack, I used the Bermuda Bay and punched out the circle using the Starburst Punch.

Southern Serenade Stamp Set, Bermuda Bay, Thank you card

When I put the stamped circle on the foil circle I thought it looked a little lost so I sponged the edges with Burmuda Bay ink to make it pop. I then added two strips of the same DSP at the bottom of the card.
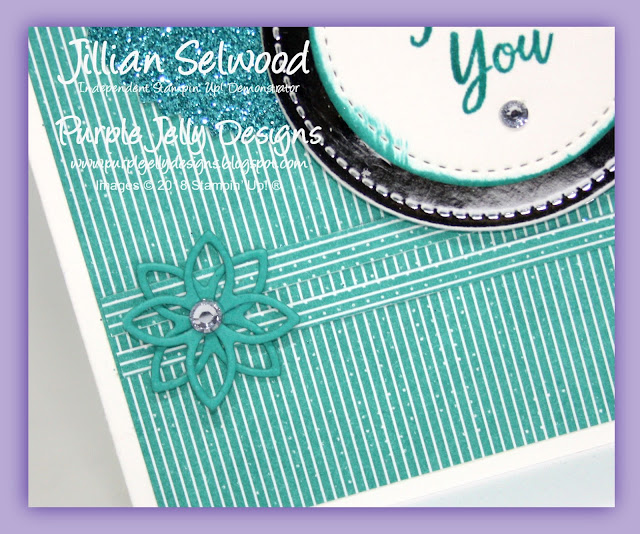
Flourish Thinlit Dies, Southen Serenade, Sparkle Shimmer and shine card

Finally I added two die cut flowers die cut from the Flourish Thinlits before adding lots of Wink of Stella and some Basic Rhinestones for that bit of bling!

Well I think I have hit the brief with this card, what do you think, do you like it?

Don't forget to hit the next button below to continue hopping through the blog, we have some very talented crafters in this group.

Thank you for stopping by this week and reading my blog, I do hope you’ve enjoyed it. Until next week.


Jillian xx

Thursday, 16 November 2017

Stampin' Up! Bundle of Love DSP Thank You Cards


Jillian Selwood, Purple Jelly Designs, Independent Stampin’ Up! Demonstrator


Welcome to the Crafty Cupcakes Team Stampin' Up! Blog Hop for November 2017. Each m

onth members of the Team take part in our Team Blog Hop to share with you our cards and projects made using the fabulous Stampin' Up! products. You are currently visiting Jillian Selwood from the UK and below you will see the full list of everyone taking part. To move to the next blog just click the name after mine in the list. 

Thank You Cards using Stampin' Up! products

The theme for this month is Thankful. Whilst we don’t celebrate thanksgiving here in the UK I do love to send Thank you cards - any excuse to make and send a card! There is always something or someone to be thankful for so it’s just nice to be able to recognise it.

For these Thank you cards I used the Bundle of Love Speciality Designer Series Paper, this beautiful paper is double sided, on one side it’s either Blushing Bride or Soft Sky and on the other side it’s cream and gold.


Blushing Bride Thank You Card, Painted Harvest Stamp Set

Soft Sky Thank You Card, Bundle of Love DSP


So I started the cards with a base of Very Vanilla thick cardstock and used a mat of either Soft Sky or Blushing Bride. Then I embossed the sentiment on the bottom - ‘I am thankful for you’ this comes from the Painted Harvest Stamp Set. Then I cut some small strips from the DSP and adhered them above the sentiment. I then punch out three circles using the new Starburst Punch in all three Designs. These were adhered to the front of the card using two of the coloured side and one of the gold side.

Thank You card, Starburst Punch, Bundle of Love DSP

Finally, I die cut the smaller flower from the Flourish Thinlet dies and adhered this on top of the two strips of DSP at the bottom of the card before adding a gold Faceted gem to the centre. I was rather pleased with how these turned out and I really hope the recipients like them too.

Thank You Card, Flourish Thinlit Dies, Gold Faceted Gems

Thank you once again for visiting my blog and taking part in our blog hop, there are so many amazing ideas and inspiration you don't want to miss so make sure you carry on hopping through the list. Remember that currently you are at my blog Jillian Selwood so check the blog hop line up list to see who is next.


Until next week
Jillian xx

Friday, 30 June 2017

Card Swap May

Jillian Selwood, Purple Jelly Designs, Independent Stampin’ Up! Demonstrator

The theme for last month was Christening. I really struggled with this one as I don't have any stamp sets that say Christening, so I cheated and printed my sentiment.

This is the card I made

Flourish Thinlet Dies, Marina Mist, Christening Card


I used the Flourish Thinlet Dies to make the cross. I adhered the cross on a piece of Whisper White cardstock that I'd embossed with the Softly Falling Embossing Folder.


Marina Mist, Softly Falling Embossing Folder, Personalised Christening Card for a boy


This is the card I received from Laurie Jennings, it is absolutely beautiful. I do love the cable knit embossing folder it has so much texture.


Thank you for stopping by this week and reading my blog, I do hope you’ve enjoyed it. Until next week.


Jillian xx

Saturday, 18 February 2017

Simply Sketched Saturday Challenge February 2017

Jillian Selwood, Purple Jelly Designs, Independent Stampin’ Up! Demonstrator


Thank you for joining us for another Simply Sketched Saturday Challenge! We’re so excited to be sharing this hop with you.  The products used are all available in the current Annual, or seasonal, Stampin’ Up!® Catalogues*. Simply use the buttons at the bottom of the post to keep hopping!

The lovely Sam Charlton designed our sketch this month and here it is:


As soon as I saw it I loved it, what a brilliant sketch so thanks so much Sam.

Here is my take and I'm rather pleased with it.

Blooms and Wishes DSP, Rich Razzleberry Cardstock, Blushing Bride Cardstock, Sweet Sugarplum Cardstock

I used our thick Whisper White as a base and then used some of the Blooms and Wishes DSP (Designer Series Paper) as a mat. I cut out the circles using the new stitched framelits in Rich Razzleberry, Sweet Sugarplum and Blushing Bride. I used a smaller circle and Whisper White cardstock for the sentiment. 

Thank you card using Stampin' Up! supplies

The darker stripes are from the same DSP pack and the flower and leaf are from the Flourish Thinlet dies. 

Flourish Thinlet Die, One big meaning stamp set

I used a thank you from the One big meaning stamp set, this sentiment fits perfectly in the smallest circle die and was finished off with some basic rhinestones. You can just see the Wink of Stella I painted on the outside edge, no idea why it doesn't show up on camera as in real life it is so sparkly.

One big meaning stamp set, Wink of Stella, Thank you card

Thanks for stopping by today, I do hope you like this weeks card.

Don't forget to use the buttons below to continue hopping.

Until next week

Jillian xx


09 10